Assessing Your Rider Height and Bike Size Correlation
Selecting a bike that’s the right size for you is crucial for comfort and safety. Your physical height directly influences the frame size you need. Use this as a primary guide when shopping for a new bicycle. First, measure your height accurately. Stand against a wall with flat shoes or barefoot and use a tape measure. Record your height. Next, compare your measurement with a size chart. Many bike shops and manufacturers provide charts correlating height to bike sizes. For example, if you stand between 5ft 6in and 5ft 9in, a Medium or ‘M’ sized bike may fit you well.
Remember, these charts are starting points. They help narrow down choices but don’t guarantee perfect fit. Always consider leg inseam length too. It affects your standover height clearance. Standover height is the space between you and the top tube when you’re standing over the bike. Look for at least one centimeter of clearance. No bike chart is universal. Formulas differ across brands. After consulting a size chart, take a test ride. Riding the bike gives you the best feel for size and comfort. Look for a bike that allows for adjustments. Once you have a bike, you can tweak saddle height and handlebar positions. The goal is a bike that ‘feels right’ under you. Choose wisely to ensure many enjoyable, comfortable rides to come.
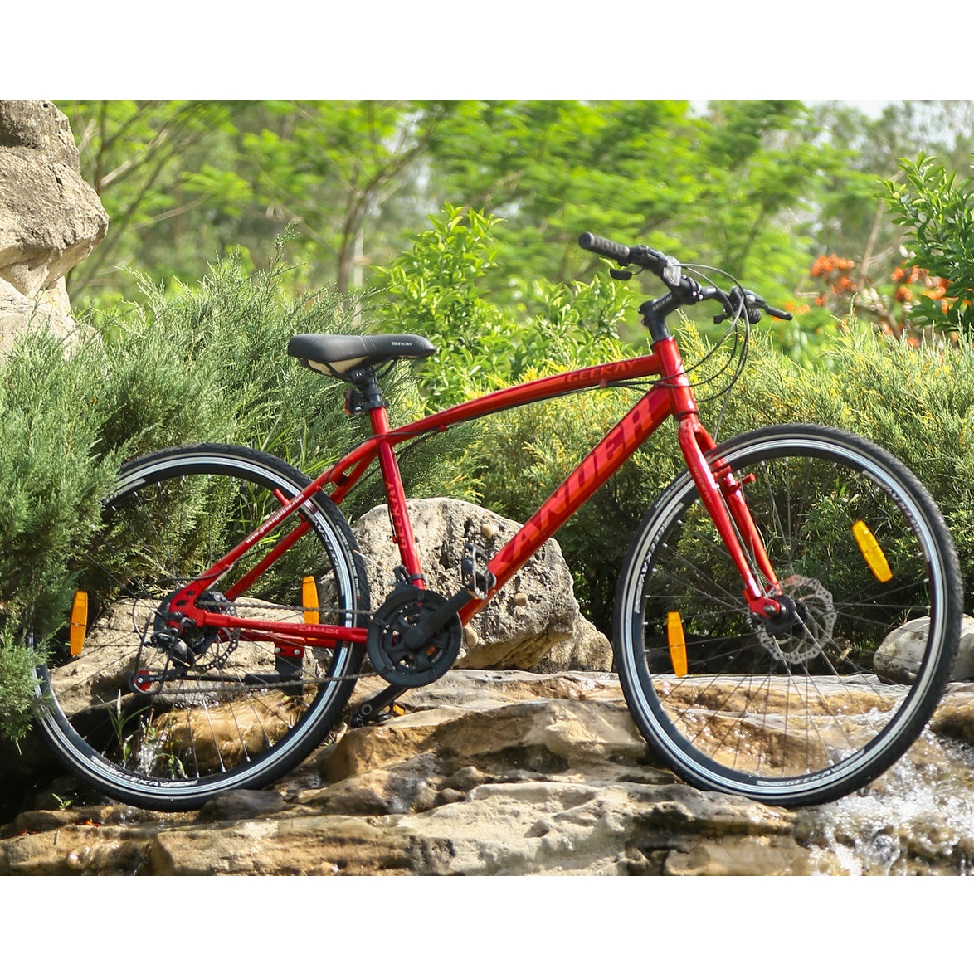
Frame Shape Significance: Traditional, Semi-Compact, and Compact Models
Choosing the right frame shape is crucial for comfort and performance. The frame shape affects your position on the bike and how the bike handles. Let’s look at the three main models.
Traditional Frames
Traditional frames feature a horizontal top tube. They are less common now but offer a classic riding position. Their straight top tube means sizing is critical. You need the right fit for both comfort and reach.
Semi-Compact Frames
Semi-compact frames come with a slightly sloping top tube. They offer a balance between a race-ready position and comfort. These models give you a bit more standover clearance than traditional frames.
Compact Frames
Compact frames have a more pronounced sloping top tube. These give the most standover clearance. They can also feel stiffer and more responsive. A compact frame might suit those seeking a sportier ride.
Each frame shape has its benefits. It’s about finding what works for your body and your riding style. Consider the frame shape when deciding what size bicycle you need. Always test different models to find the best fit for you.
Key Measurements of Road Bike Geometry
Understanding road bike geometry is key to finding the perfect bike size. It’s not only about the frame size but also about how the bike’s structure shapes your comfort and control.
Frame Size
The frame size, usually measured by the seat tube length, provides a basic indicator of the bike’s scale. However, two bikes can have the same frame size but very different geometries.
Effective Top Tube (ETT)
The ETT is the horizontal distance between the head tube and the seatpost. It’s crucial for reach and comfort. If too long, you’ll overstretch; if too short, you’ll feel cramped.
Stack
Stack is the vertical distance from the bottom bracket to the top of the head tube. It affects your handlebar height and riding posture. A higher stack often means a more upright position.
Reach
Reach measures horizontally from the bottom bracket to the head tube. It’s vital for finding a comfortable reach to the handlebars without altering saddle position.
Standover Height
This height is the space between the top tube and your crotch when standing over the bike. Ensure at least one centimeter of space to prevent injuries when dismounting quickly.
Wheelbase
The bike’s wheelbase influences stability and maneuverability. A shorter wheelbase can make the bike feel more responsive; a longer one may increase comfort and steadiness.
When considering what size bicycle you need, pay attention to these measurements. They shape the bike’s ride quality and your comfort. Always double-check these key numbers against your body measurements.
Understanding Stack and Reach for Comparing Bike Sizes
When you choose what size bicycle you need, stack and reach are crucial. Stack is the vertical distance from the center of the bottom bracket to the top of the head tube. Reach is the horizontal distance from the bottom bracket to the head tube. Together, they define the bike’s fit more precisely than frame size alone.
Why Stack and Reach Matter
These measurements are vital for comparing bikes across different brands. Since each manufacturer might have their own sizing standards, stack and reach provide a consistent basis for comparison. They help you understand how a bike will fit your body.
- Stack influences the handlebar height. A higher stack offers a more upright riding position. This can reduce strain on your back and is great for longer rides.
- Reach affects how far you’ll stretch to the handlebars. A longer reach can give a more aerodynamic position, suited for speed and racing.
Using Stack and Reach for Comfort
To find a comfortable bike, the vertical and horizontal distances must suit your body. Longer legs might need a bike with higher stack. A shorter torso suggests a bike with shorter reach.
How to Measure Stack and Reach
Most bike manufacturers list stack and reach on their websites or in their catalogs. If you’re planning to buy online, make sure to review these numbers. They are key to ensuring the bike will fit without a test ride.
Adjusting Your Bike With Stack and Reach
Even after you buy a bike, you can adjust stack and reach somewhat. You can raise or lower the handlebars or move the seat forward or back. These adjustments help fine-tune the bike’s fit to your body. A proper bike fit specialist can help with these adjustments.
Stack and reach are technical aspects, but they are very important. They ensure your bike fits well and feels good to ride. Always keep these measurements in mind when you search for a new bike, and you’ll find the right fit for you.
The Importance of a Test Ride Before Buying
Taking a test ride is crucial in selecting the right bicycle. It’s the best way to feel if the bike suits your needs. When you test ride, notice the bike’s comfort, handling, and responsiveness. Ensure to test different models and sizes. This will help confirm the bike size chart recommendations. A test ride reveals much more than static measurements can. Feel for the reach, the fit, and the ease of control. Different bikes can feel quite unique, even with similar size charts.
Pay attention to adjustments that you can or cannot make. Make sure the bike can adjust to your fit needs after purchase. Remember, comfort on the bike is key for enjoyable rides. Don’t skip this step, it’s one of the best indicators to ensure what size bicycle you need. When test riding, visit multiple retailers if possible. This gives you a broad range of bikes to compare. Decide after you’ve tested enough bikes to feel confident in your choice. Always test ride before buying your bike for the best riding experience.
Adjusting Contact Points: Saddle, Handlebars, and Pedals
When choosing what size bicycle you need, adjusting contact points is essential. Here’s how you tailor these to ensure a perfect bike fit:
Adjust the Saddle
For optimal comfort and efficiency, the saddle height must be right. Your leg should have a slight bend when the pedal is at its lowest point. Move the saddle up or down to find this position. The saddle’s fore and aft position also matters. Ensure your knee is over the pedal spindle when the pedal is mid-stroke.
Set the Handlebars
Handlebar position affects your upper body comfort. Adjust the height and reach to avoid strain on your shoulders and back. A higher handlebar can relieve stress on your back. Closer handlebars can prevent overreaching. Take time to test different positions during a ride.
Position the Pedals
The pedals should align with your forefoot for efficient power transfer.
Proper cleat placement, if using clipless pedals, helps keep your legs in the correct motion path. This reduces the chance of injury and improves cycling efficiency.
Remember, even with the right frame size, these adjustments are vital. They further refine your fit, offering a tailored ride experience. Visit a local bike shop for personal advice or a professional bike fit, if needed.
Making these tweaks ensures a better ride, reduces risk of injury, and enhances comfort. Don’t overlook the importance of fine-tuning these contact points when determining what size bicycle you need.
Utilizing Manufacturer Size Guidelines and Size Charts
When choosing what size bicycle you need, manufacturer size guidelines and size charts are invaluable tools. Here is how to make the most of them:
Follow Manufacturer Size Recommendations
Bike makers often list size charts that match rider height with bike sizes. Start by comparing your height with these charts. They are simple to use and give you a basic idea of what bike frame to consider. Always see these recommendations as a starting point.
Check for Size Variability Across Brands
Remember, bike sizes can differ between brands. A ‘Medium’ from one brand may feel different from another. Review the size charts for each brand you are considering. Focus on the specifics of their sizing to find the best match for you.
Understand Frame Size Labels
Bike sizes might show up as numbers or letters like ‘S’, ‘M’, or ‘L’. Numbers often refer to the seat tube length, while letters indicate a range. Study the sizing details provided by the manufacturer. It helps to clarify what each size means for their bikes.
Effective Top Tube as a Guide
Look for the Effective Top Tube (ETT) measurement in the size charts. This number is key for your reach and riding comfort. Find a bike size with an ETT matching your upper body length.
Keep in Mind the Importance of Test Rides
Size charts are just guides. If possible, always go for a test ride. It confirms if the recommended size fits well and feels right. Don’t buy a bike based solely on the chart without trying it out first.
By using manufacturer size guidelines and size charts correctly, you can come closer to selecting a bike that fits well. Keep in mind, your comfort and the bike’s feel are the ultimate tests of what size bicycle you need. Don’t hesitate to seek further advice from bike shop experts.
Choosing the right size bicycle can be confusing due to brand variations. Different brands may have unique sizing charts. These charts often reflect their design philosophy and target customer base. To navigate this variance, focus on the critical measurements.
Start by understanding a brand’s sizing approach. Some use the seat tube length, while others focus on stack and reach. Compare these measurements with your body size. This helps you to get closer to the perfect fit.
Do not rely solely on labels such as ‘Small’, ‘Medium’, or ‘Large’. These can vary greatly between brands. Instead, look at the actual measurements provided. The effective top tube length (ETT) is particularly important. It plays a key role in your comfort and bike control.
Another point is the standover height. This is the space between you and the bike when standing over it. Consistency in this measurement is rare across brands. Be sure to check it for each bike you consider.
Remember that a test ride can clarify doubts. It shows how the bike’s size feels when in motion. After considering the charts and guidelines, always try to get a feel for the bike in person.
If in doubt, consult an expert at a bike shop. They can offer personalized advice tailored to your measurements. This can save time and ensure you choose the best bike for your needs.
Navigating bike brand variations can be tricky. But with the right approach, you can find what size bicycle you need. Keep in mind these steps and always double-check with test rides and professional advice.
Finalizing Bike Fit: Standover Height and Fine-Tuning Adjustments
When finalizing your bike fit, two critical aspects come into play: standover height and fine-tuning adjustments. Both have a major impact on your comfort and safety while riding. Here’s what you need to know to make these final adjustments.
Standover Height
- Measure Standover Height: Ensure at least one centimeter of space between the top tube and your crotch when standing over the bike. This is crucial for quick dismounts and overall comfort.
- Check Your Fit: Your bike should feel good when you stand over it. If the standover height is too high, consider a different size or model.
Fine-Tuning Adjustments
- Saddle Height: Adjust the saddle so that there’s a slight bend in your knee when pedaling. Your leg shouldn’t be fully extended at the bottom of the pedal stroke.
- Saddle Position: Make sure the saddle is set so that when the pedal is at three o’clock, your knee is directly above it.
- Handlebar Height and Reach: Adjust the handlebars so you can reach them comfortably without straining your back, neck, or shoulders.
- Pedal Position: If you’re using clipless pedals, ensure your cleats are positioned to allow a natural leg movement.
Fine-tuning these points can seem tedious, but they are essential. They affect your ride quality and reduce the risk of injury. Take your time making these adjustments, or seek help from a professional bike fitter. With these final touches, you’ll ensure that your bike not only fits but also enhances your riding experience.
