Introduction to Bicycle Tire Replacement
Replacing a bicycle tire might seem complex, yet with the right knowledge, it’s quite manageable. Every cyclist, from beginners to seasoned riders, will likely face a tire replacement at some point. Understanding how to replace a bicycle tire is crucial for maintaining your bike and ensuring a safe ride. It’s not just about swapping out the old for the new; it’s about taking the opportunity to inspect other vital components of your bike, ensuring everything is in top condition. Throughout this guide, we’ll cover everything you need to replace a bicycle tire efficiently. This includes the vital tools you’ll need, a comprehensive step-by-step process, pointers for inspecting your tire and wheel, and tips to secure the tire properly. We aim to arm you with the confidence to perform this task smoothly and get back to enjoying your rides with minimal downtime.

Essential Tools for Replacing a Bicycle Tire
Before you start to replace a bicycle tire, gathering the right tools is critical.
Tire Levers
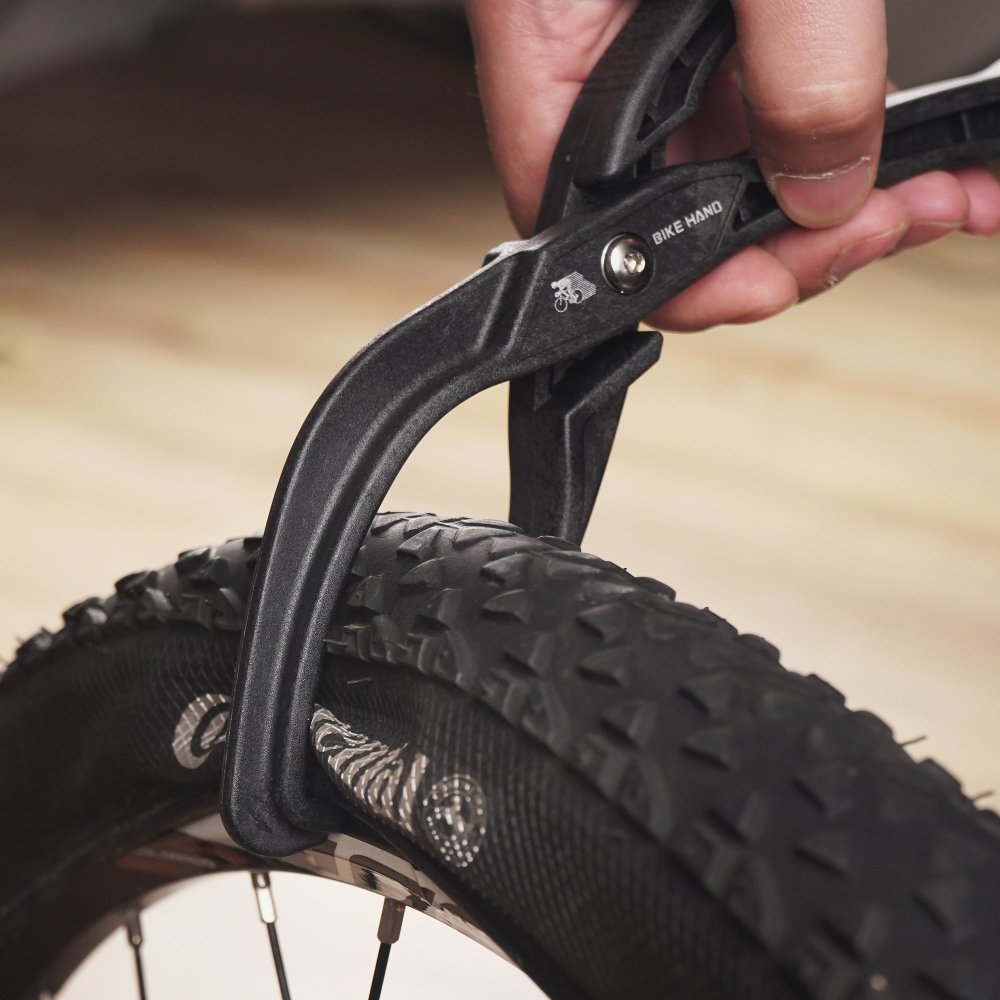
Tire levers are indispensable for removing and fitting tires. Opt for durable levers to avoid snapping during use.
Pump
Ensure your pump is compatible with your tire’s valve type. A floor pump can make inflation quicker.
Replacement Tube
Have the correct size and valve type for your tire. A spare tube can save time.
Patch Kit
For minor repairs, a patch kit can let you fix punctures without full replacement.
Inspection Tools
Keep a rag and flashlight handy to check the tire and rim for damage.
Gathering these tools ensures you’ll be prepared for most tire replacement tasks. Remember, quality tools are an investment for both the current and future maintenance of your bicycle.
Step-by-Step Guide to Removing the Old Tire
When the time comes to replace a bicycle tire, following a systematic approach simplifies the process. We’ll dive into the essential steps to remove your bike’s old tire and ready your wheel for a new one. Whether you’re tackling this at home or on the go, these instructions aim to ease the task.
Deflate the Tire
Start by deflating the tire completely. For Presto valves, unscrew the cap, loosen the valve’s barrel, and press it down. For Schrader valves, press the center pin. Ensure all air is out to make removal easier.
Unseat the Tire
Next, press around the tire’s circumference to push the bead to the rim’s center. Do this for both sides creating slack, which simplifies the next steps.
Remove the Tire by Hand or Using Levers
Attempt to peel the tire off with your hands from one side. If it’s too tight, use tire levers. Slide a lever under the tire bead and pry it over the rim. Work around the edge until the tire frees. Be careful not to pinch the inner tube if you’re saving it.
By following these steps, you’ll have the old tire off in no time. Next, we’ll examine the tire and wheel for any issues that need addressing before fitting a new tire.

Inspecting the Tire and Wheel
Before installing a new tire, it’s important to inspect the old tire and the wheel. This step can help you avoid future problems and ensure your bike performs well.
Checking the Tire for Damage
As you remove the old tire, take a moment to look for signs of wear or damage. Check for cuts, punctures, or embedded objects like thorns or glass. Also, look for worn treads or sidewalls that might suggest it’s time for a replacement. If you spot any issues, you’ll know to replace, not just repair.
Examining the Wheel Rim
Next, turn your attention to the wheel rim. Use a rag to wipe it down and a flashlight to spot any issues. Look for bends, cracks, or dents in the rim. A damaged rim might cause tire fitting issues or a bumpy ride. Also, check for sharp edges that could damage the new tire or inner tube.
Handle these issues before moving on to fit a new tire. This way, you can ride confidently, knowing your bike is in top shape. With a thorough inspection, you’re now ready to prepare and install your new tire.
Preparing the New Tire for Installation
Once your old tire is off and your wheel is carefully inspected, it’s time to prepare the new tire for installation. Ensuring your new tire is ready beforehand will make the fitting process smoother and less time-consuming.
Checking Inner Tube Size and Valve Type
Before installation, check the inner tube’s size and valve type. Confirm the inner tube matches your new tire’s size. Make sure its valve suits your wheel’s rim hole. A mismatch can cause fitting issues and impair riding quality. Short valves may not protrude enough for inflation, and oversized tubes can fold, causing uneven riding surfaces.
Mounting One Side of the Tire
Start by fitting one edge of the tire onto the rim. This is the tire’s bead; it must sit snugly within the rim’s groove. Begin at the valve hole, aligning the tire label for future ease. Proceed around the rim, pushing the bead over the edge. It should fit into place without forcing. This first step helps to position the tire for the next part: installing the inner tube and securing the tire’s other side.
Installing the Inner Tube and Fitting the Tire
Once you’ve prepared the wheel and the new tire, it’s time to install the inner tube and finish fitting the tire. This part of the process is crucial for ensuring a smooth ride and avoiding future issues.
Inserting the Inner Tube
First, insert the inner tube into the tire. Start by inserting the valve through the hole in the rim. Ensure that the valve is straight and not caught between the tire and the rim. Slightly inflate the inner tube to prevent it from getting twisted or pinched. Position the tube evenly inside the tire.
Fitting the Second Side of the Tire
Next, carefully work the second side of the tire onto the rim. Begin at the side opposite the valve to help keep the valve in place. Use your thumbs to press the tire into the rim. Work your way around the wheel, pressing the tire firmly into place. If it feels too tight, use tire levers to help lift the tire bead over the rim, but be gentle to avoid pinching the tube.
These steps are key to replacing a bicycle tire properly. Ensuring the tire and inner tube are correctly fitted will give you confidence in your bike’s performance on your next ride.

Final Steps for Securing the Tire
Once the tire is mounted and the tube is in place, secure the tire properly.
Inflating the Tire Carefully
When inflating, proceed slowly to avoid pinching the inner tube. Monitor the tire’s fitting. Stop and check for bulges or twists in the tire. If you spot issues, deflate and adjust before continuing. Use the pump gauge to fill to the correct pressure. This ensures a firm, safe ride.
Checking Tire Seating and Wheel Alignment
Spin the wheel to inspect the tire seating. Ensure the tire sits evenly around the rim. Look for wobbles or uneven tire seating. Fix any misalignment by deflating, repositioning the tire, and inflating again. Confirm wheel alignment by placing it back on the bike. The wheel should rotate straight without rubbing on the frame or brakes.
With these final steps, your bike tire replacement is complete. You’re set for a secure and smooth ride. Remember to replace a bicycle tire with attention to detail for the best results.
Tips for Maintenance and Trouble-Free Rides
Maintaining a bicycle and its tires is key for smooth, trouble-free rides. Here are practical tips to ensure your bike stays in great shape:
Regularly Check Tire Pressure
Check your tire pressure often. Proper pressure ensures better performance and reduces wear. Use a reliable gauge to check and adjust as needed.
Clean Your Bike After Rides
Clean your bike after each ride, especially if you’ve been off-road. Pay attention to the tires and rims. Remove any debris or dirt that might cause wear or punctures.
Inspect Tires for Wear and Tear
Regularly inspect your tires for signs of wear, cuts, or embedded objects. Replace tires that show excessive wear to avoid blowouts or flats.
Rotate Your Tires
Rotate your tires periodically. This can help them wear evenly, extending their life. It’s a simple step that can save you money in the long run.
Store Your Bike Properly
Store your bike in a cool, dry place. Avoid places with temperature swings or humidity. Proper storage prevents tire damage and keeps them ready for your next ride.
Following these tips will help you maintain your bike’s tires effectively. This can lead to safer and more enjoyable rides.
Conclusion: Ready to Ride With Confidence
Congratulations on successfully replacing your bicycle tire! You have mastered a crucial skill that ensures your bike continues to operate smoothly and safely. With a new tire properly installed, you can ride with greater confidence, knowing your bicycle is in excellent condition.
Make sure to follow the maintenance tips shared earlier, like regularly checking tire pressure and cleaning your bike, which help prolong the life of your tires and keep your rides worry-free. Additionally, keep inspecting your tires and wheels regularly to catch potential issues early, ensuring ongoing performance and safety.
With this comprehensive guide and your new skills, you’re ready to tackle future tire replacements independently, saving both time and money. Here’s to many more enjoyable and secure cycling adventures ahead!

