Essential Tools for Bicycle Maintenance
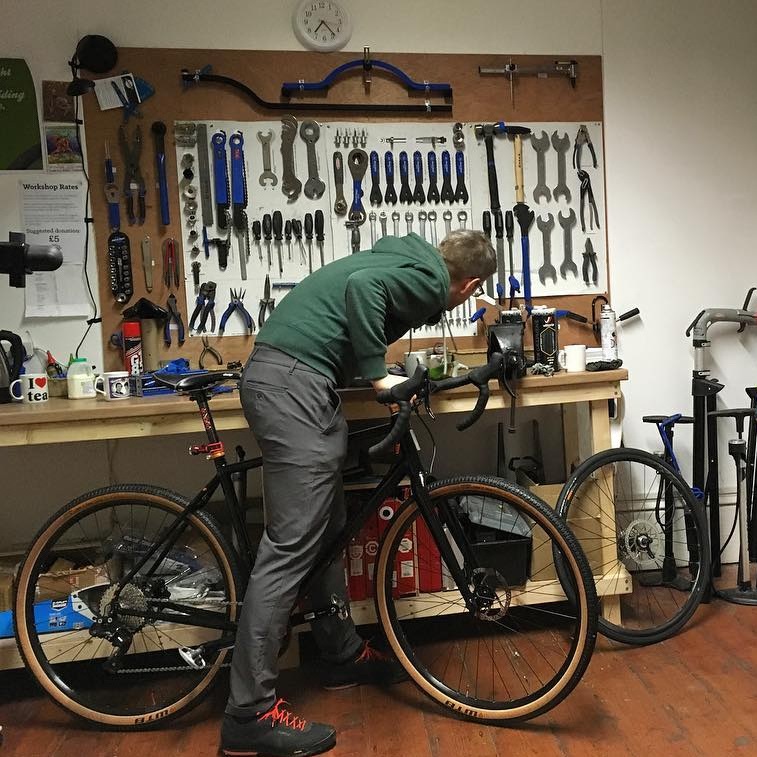
To excel in bicycle maintenance, it’s crucial to have the right tools at your disposal. Here, we’ll dive into the essential tools that every cyclist should own to keep their bike in top condition. These tools are not just for fixing problems. They also help you perform regular checks and adjustments with ease.
- Wrench Set – A variety of wrench sizes will cover most of the nuts and bolts on your bicycle.
- Screwdrivers – Both flat-head and Phillips-head screwdrivers are important for adjusting components.
- Tire Levers – These are indispensable for removing tires during a puncture repair.
- Pump – A quality floor pump with a pressure gauge ensures your tires are inflated to the right level.
- Puncture Repair Kit – This should include tire patches, adhesive, and sandpaper to fix flat tires.
- Chain Tool – Needed for repairing or replacing a bike chain.
- Cable Cutters – Essential for cutting brake and gear cables cleanly.
- Hex Keys/Allen Wrenches – Many bicycle components use hex bolts, making these tools vital.
- Torque Wrench – To prevent over-tightening and damaging your bike, using a torque wrench is wise.
- Cleaning Brushes and Cloths – Keeping your bike clean is a big part of maintenance, and the right brushes will make this job easier.
Remember, investing in quality bicycle maintenance tools can save you money and time in the long run. Regular use of these tools can prevent many common issues, helping to maintain your bike’s longevity and performance.
Routine Bicycle Inspection Checklist
Regular inspection is key in bicycle maintenance. It ensures safety and bike longevity. Follow this checklist to keep your bike in optimal condition:
- Check the Tires: Look for cuts, wear, and check tire pressure.
- Inspect the Brakes: Test brake levers and pads for proper function and wear.
- Examine the Chain: Clean and lubricate regularly, and check for stretch.
- Look Over the Wheels: Ensure they are true and spokes are tight.
- Test the Gears: Shift through all gears to confirm smooth operation.
- Inspect the Cables: Check for fraying or rust and ensure they move freely.
- Handlebars and Seat: Make sure they are secure and correctly positioned.
- Bolts and Fasteners: Confirm all are tight and right to their specs.
- Frame and Fork: Check for any damage or unusual wear signs.
- Accessories: Make sure lights, racks, and other add-ons are secure.
Tick off each item before and after your rides. This helps spot potential issues early. With regular inspections, you’ll reduce the risk of breakdowns and ensure your bicycle performs well. Practicing proactive bicycle maintenance will also enhance your riding experience.
Step-by-Step Guide to Cleaning Your Bicycle
Keeping your bicycle clean is not only a matter of pride but also an important aspect of regular bicycle maintenance. A well-cleaned bike can prevent wear and tear and detect potential issues before they become serious problems. Here’s a step-by-step guide to cleaning your bicycle efficiently:
- Gather Your Supplies: You’ll need water, a hose, a bucket, mild detergent, a sponge or a soft brush, and dry cloths.
- Preliminary Rinse: Gently rinse your bike to remove loose dirt.
- Apply Detergent: Mix the mild detergent with water in the bucket and apply it to your bike using the sponge or brush.
- Scrub the Tough Spots: Pay extra attention to areas that tend to collect gunk such as the chain, gears, and bottom bracket.
- Rinse Thoroughly: After scrubbing, rinse your bike well to remove all soap residue.
- Dry the Bike: Use dry cloths to absorb water and prevent rust on the metallic parts.
- Lubricate the Chain: Apply a quality lubricant on the chain to ensure a smooth ride.
- Double-Check: Inspect your bike for any missed spots and wipe down as needed.
Regular cleaning following this guide will help maintain optimal performance and extend the lifespan of your bike.

Basic Repairs Cyclists Should Know
For any cyclist, knowing how to perform basic repairs can be a lifesaver, especially during long rides. Simple knowledge of bicycle maintenance can get you back on the road quickly and save you from being stranded. Here’s a breakdown of basic repairs every cyclist should be familiar with:
- Fixing a Flat: Learn to remove the wheel, take out the old tube, patch it or replace it with a new one, and remount the tire.
- Adjusting the Brakes: Know how to tighten or loosen your brake cables and replace worn-out pads to ensure a safe stopping distance.
- Repairing the Chain: Master the art of fixing a slipped or broken chain so that you’re not stuck pedaling nowhere.
- Tightening Loose Parts: Inspect and tighten any loose screws or bolts to prevent any parts from falling off.
- Truing the Wheels: Understand the basics of wheel truing to keep your ride smooth and wobble-free.
These repairs don’t require advanced skills but do need practice. Make time to familiarize yourself with these tasks, so you’re prepared for whatever your ride throws at you. Your toolkit should be your faithful companion on every cycling adventure, equipped for these basic repairs. With bicycle maintenance knowledge in your arsenal, you’ll optimize your bike’s performance and enjoy a more reliable ride. Keep practicing, stay prepared, and cycle with confidence knowing you can handle common roadside troubles.
How to Change and Fix a Tire
Changing or fixing a tire is a key bicycle maintenance skill. With the right know-how, you can quickly get back to your ride. Here is a simple guide for any cyclist to follow:
- Prepare Your Tools: You’ll need tire levers, a new tube, a pump, and your puncture repair kit.
- Remove the Wheel: Loosen the bolts or release the quick-release lever to take the wheel off.
- Take Off the Tire: Insert tire levers under the edge of the tire and work them around to remove it.
- Inspect the Tire: Look inside for sharp objects and outside for cuts that could cause flats.
- Check the Inner Tube: Inflate the tube to locate the puncture if repairing, or simply replace it.
- Patch the Tube: If patching, roughen the area around the hole, apply glue, and place the patch on firmly.
- Reinsert the Tube: Place the tube back into the tire and fit the tire back onto the rim.
- Pump the Tire: Inflate the tire to the recommended pressure, as indicated on the tire sidewall.
- Reinstall the Wheel: Put the wheel back on the bike, making sure it’s aligned and secure.
- Test Ride: Go for a short ride to ensure everything is working correctly and the tire is stable.
Remember, practice makes perfect. Do not hesitate to practice changing and fixing a tire at home. This helps you feel confident to address tire issues that may arise during your rides. Mastering this will not only enhance your biking experience but also prove valuable during longer cycling adventures.
Brake Maintenance and Adjustment
Proper bicycle maintenance includes paying close attention to your brakes. Badly maintained brakes can lead to unsafe riding conditions. Follow these simple steps to ensure your brakes are in top shape:
- Check Brake Pads: Worn brake pads need replacing to ensure effective stopping power.
- Adjust Cable Tension: Tighten or loosen brake cables for better response.
- Clean Brake Surface: Wipe rims or disc brake rotors with a clean cloth to remove dirt.
- Align Brake Pads: Make sure brake pads hit the rim squarely and don’t rub on the tire.
- Test Brake Levers: Levers should feel firm and spring back when pressed. Adjust as needed.
- Inspect Brake Hoses: For hydraulic systems, check hoses for leaks or damage.
- Lubricate Moving Parts: Apply lubricant to pivot points but avoid getting oil on the brake surface.
Ensuring your brake system is well-maintained will make your rides safer and more enjoyable. Always test your brakes before a ride. If they feel spongy or slack, they may need more attention. Keep your brakes in check as part of your regular bicycle maintenance routine.
Gear System Care and Troubleshooting
Proper bicycle maintenance extends to your bike’s gear system. A smooth gear system provides a comfortable ride and efficient performance. Here are steps for gear system care and troubleshooting:
- Clean Gears Regularly: Dirt and grime cause wear and poor shifting. Wipe and clean the gears after rides.
- Lubricate the Chain: Use a quality bike-specific lubricant for chains to reduce friction and prevent rust.
- Check Gear Cables: Replace frayed or rusted cables to ensure responsive gear changes.
- Adjust Derailleurs: Align front and rear derailleurs for precise shifting. Follow your bike’s manual for specific instructions.
- Inspect Chain for Wear: A stretched chain can damage gears. Check chain wear with a tool or ruler.
- Troubleshoot Shifting Problems: If gears are skipping or noisy, check for proper cable tension and derailleur alignment.
- Replace Worn Parts: Swap out worn chains, cassettes, or chainrings to avoid further issues.
By keeping the gear system in check, you reduce the risk of mid-ride troubles. Perform these tasks often as part of regular bicycle maintenance. This will help in avoiding gear slippage and ensure a more reliable, smooth cycling experience.
Preparing Your Bicycle for Different Weather Conditions
When cycling through various weather conditions, preparing your bike is key for safe and comfortable rides. Here are some tips for bicycle maintenance tailored to different weather scenarios:
- Dry and Dusty Conditions: Clean your bike after rides. Dust can wear down components. Lubricate the chain more often to prevent grime build-up.
- Wet Weather: Use fenders to prevent road spray. Apply water-resistant lubricant to the chain. Check brakes regularly, as wet conditions can reduce their effectiveness.
- Cold Conditions: Pay attention to tire pressure. Cold can reduce it, affecting grip. Grease metal parts to protect against corrosion from salt and moisture.
- Hot Conditions: Check tire pressure regularly. Heat can cause it to rise, risking a blowout. Keep hydration accessories clean and functional.
By adjusting your bicycle maintenance routines according to the weather, you’ll prolong the life of your bike and enjoy a safer ride no matter the conditions.